Sanding a furniture surface is a crucial step in the furniture refinishing and restoration process. It not only smooths out the surface but also prepares it for painting, staining, or other finishing touches. As a professional sandpaper abrasive supplier, I'm here to share comprehensive guidance on how to sand a furniture surface effectively using our high - quality sandpaper abrasives.
Understanding the Basics of Sandpaper Abrasives
Before we dive into the sanding process, it's essential to understand the different types of sandpaper abrasives available. We offer a wide range of abrasives, each with its unique properties and applications.

Garnet Sand
Garnet Sand is a natural abrasive known for its sharpness and durability. It is ideal for sanding softwoods and finishing work. Garnet sandpaper cuts quickly and leaves a smooth finish, making it a popular choice for furniture sanding. It is also less likely to clog compared to some other abrasives, which means it can maintain its cutting efficiency for a longer time.
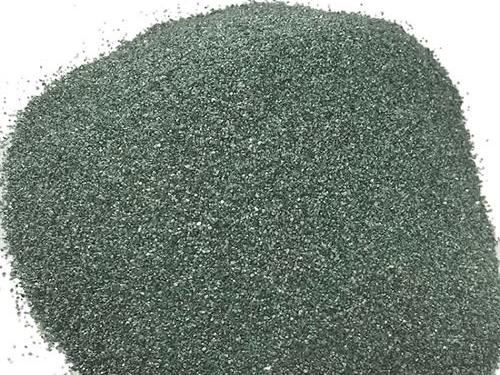
Green Silicon Carbide Abrasive
Green Silicon Carbide Abrasive is a synthetic abrasive that is extremely hard and sharp. It is perfect for sanding hard materials such as hardwoods, metals, and plastics. This type of abrasive is highly effective in removing stubborn finishes and smoothing rough surfaces. Green silicon carbide sandpaper can cut through tough materials quickly, reducing the sanding time significantly.
White Corundum
White Corundum is another synthetic abrasive that offers excellent cutting performance. It is suitable for a variety of sanding tasks, including sanding wood, metal, and painted surfaces. White corundum sandpaper is known for its long - lasting sharpness and ability to produce a fine finish. It is often used in the final sanding stages to achieve a smooth and polished surface.
Preparing for Sanding
Proper preparation is key to achieving a successful sanding job. Here are the steps you should take before you start sanding your furniture:
Gather Your Tools
You will need a variety of tools for sanding, including different grits of sandpaper, sanding blocks, a dust mask, safety goggles, and a vacuum cleaner. Make sure you have all the necessary tools on hand before you begin.
Choose the Right Sandpaper Grits
The grit of sandpaper refers to the size of the abrasive particles on the paper. Lower grit numbers indicate coarser sandpaper, which is used for removing large amounts of material quickly. Higher grit numbers indicate finer sandpaper, which is used for smoothing and finishing the surface. For furniture sanding, you will typically need a range of grits, starting from a coarse grit (such as 60 - 80 grit) to remove old finishes and smooth rough areas, and then moving on to medium (120 - 150 grit) and fine (180 - 220 grit) grits for a smooth finish.
Protect the Surrounding Area
Sanding can generate a lot of dust, so it's important to protect the surrounding area. Cover the floor and nearby furniture with drop cloths to prevent dust from settling on them. You may also want to work in a well - ventilated area or use a dust collection system to minimize the amount of dust in the air.
Remove Hardware
If your furniture has any hardware, such as handles, knobs, or hinges, remove them before sanding. This will make it easier to sand the entire surface evenly and prevent damage to the hardware.
The Sanding Process
Once you have prepared everything, you can start the sanding process. Here is a step - by - step guide on how to sand a furniture surface:
Start with Coarse Sandpaper
Begin by using a coarse grit sandpaper (60 - 80 grit) to remove the old finish and smooth out any rough areas on the furniture surface. Wrap the sandpaper around a sanding block to ensure even pressure and a flat sanding surface. Sand in the direction of the wood grain to avoid scratching the surface. Apply firm but even pressure, and keep the sandpaper moving to prevent over - sanding in one area.
Check Your Progress
Periodically stop sanding and check your progress. You can run your hand over the surface to feel for any rough spots or uneven areas. If you find any, continue sanding those areas until they are smooth.
Move to Medium Grit Sandpaper
After you have removed the old finish and smoothed out the rough areas with the coarse grit sandpaper, switch to a medium grit sandpaper (120 - 150 grit). This will help to further smooth the surface and prepare it for the fine sanding stage. Sand in the same direction as the wood grain, using the same technique as before.
Clean the Surface
After each sanding stage, use a vacuum cleaner to remove the dust from the surface. You can also use a tack cloth to wipe away any remaining dust particles. This will ensure that the next sanding stage is more effective and that the final finish will adhere properly.
Finish with Fine Grit Sandpaper
Once you have sanded the surface with the medium grit sandpaper, switch to a fine grit sandpaper (180 - 220 grit). This will give the surface a smooth and polished finish. Sand very gently in the direction of the wood grain, using light pressure. Take your time to ensure that the entire surface is smooth and free of any scratches or rough spots.
Tips for a Successful Sanding Job
Here are some additional tips to help you achieve the best results when sanding a furniture surface:
Use a Sanding Block
Using a sanding block ensures that you apply even pressure across the sandpaper, which results in a more consistent and smooth finish. You can make your own sanding block by cutting a piece of wood to the appropriate size or purchase a pre - made sanding block from a hardware store.
Sand in the Direction of the Wood Grain
Sanding against the wood grain can cause scratches and an uneven finish. Always sand in the same direction as the wood grain to achieve a smooth and professional - looking result.
Change Sandpaper Regularly
As the sandpaper wears out, it becomes less effective at cutting through the material. Change the sandpaper regularly to ensure that you are getting the best results. You can tell when the sandpaper needs to be changed when it starts to clog or when it no longer cuts through the material easily.
Be Patient
Sanding is a time - consuming process, but it's important to take your time and do it right. Rushing through the sanding process can result in a poor finish and may require you to start over.
After Sanding
Once you have finished sanding the furniture surface, there are a few final steps you should take:
Clean the Surface Thoroughly
Use a vacuum cleaner and a tack cloth to remove all the dust from the surface. Make sure the surface is completely clean before you apply any finish.
Inspect the Surface
Inspect the surface for any remaining rough spots or scratches. If you find any, you can use a fine grit sandpaper to touch up those areas.
Apply a Finish
After the surface is smooth and clean, you can apply a finish, such as paint, stain, or varnish. The type of finish you choose will depend on the look you want to achieve and the type of furniture you are working on.
Contact Us for Your Sandpaper Abrasive Needs
If you are looking for high - quality sandpaper abrasives for your furniture sanding projects, look no further. As a leading sandpaper abrasive supplier, we offer a wide range of products to meet your specific needs. Our sandpaper abrasives are made from the highest quality materials and are designed to provide excellent cutting performance and durability.
Whether you need Garnet Sand, Green Silicon Carbide Abrasive, or White Corundum, we have the right product for you. Contact us today to discuss your requirements and start your next furniture sanding project with confidence.
References
- Woodworking Magazine. "Sanding Basics: A Guide to Choosing the Right Sandpaper."
- Fine Woodworking. "The Art of Sanding: Tips and Techniques for a Smooth Finish."
- DIY Network. "How to Sand Furniture: A Step - by - Step Guide."


