Adjusting pressure when using coarse abrasive is a critical aspect that can significantly impact the efficiency and quality of various abrasive - related operations. As a trusted coarse abrasive supplier, I've witnessed firsthand the importance of getting this right. In this blog, I'll share some key insights on how to adjust the pressure when using coarse abrasive.
Understanding the Basics of Coarse Abrasive and Pressure
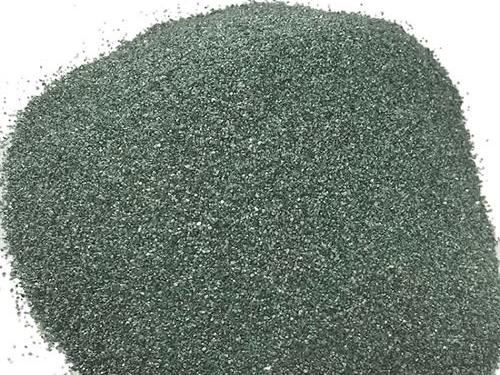
Coarse abrasives come in different types, such as Silicon Carbide Abrasive and Green Silicon Carbide Abrasive. These abrasives are used in a wide range of applications, including metalworking, woodworking, and surface finishing. The pressure applied during the abrasive process determines how aggressively the abrasive acts on the surface.
Too much pressure can lead to excessive material removal, which may damage the workpiece. For example, in metal polishing, if the pressure is too high, it can create deep scratches on the metal surface, ruining the finish. On the other hand, too little pressure may result in inefficient material removal, wasting time and resources.
Factors Affecting Pressure Adjustment
Abrasive Type
Different types of coarse abrasives have different hardness and cutting capabilities. For instance, silicon carbide abrasives are known for their high hardness and sharp cutting edges. They can generally handle higher pressures compared to some softer abrasives. Green silicon carbide abrasives, which are even harder and more brittle than regular silicon carbide, require a more delicate pressure adjustment. If the pressure is too high, the abrasive particles may break prematurely, reducing their effectiveness.
Workpiece Material
The nature of the workpiece material is a crucial factor. Softer materials like wood or plastics require lower pressures to avoid over - cutting or melting. For example, when sanding a wooden surface, applying excessive pressure can cause the wood fibers to tear, leaving an uneven finish. In contrast, harder materials such as stainless steel or hardened alloys can withstand higher pressures during the abrasive process. However, even with hard materials, the pressure should be carefully controlled to prevent surface deformation.
Abrasive Application Method
The way the abrasive is applied also affects pressure adjustment. In manual abrasive operations, such as hand - sanding, the operator has direct control over the pressure. It requires a good sense of touch and experience to maintain a consistent and appropriate pressure. In automated abrasive processes, like using a sandblasting machine, the pressure is regulated by the equipment settings. Understanding the machine's capabilities and how different pressure settings affect the abrasive performance is essential. For example, in sandblasting with Glass Beads for Blasting Sandblasting Glass Beads, the pressure needs to be adjusted according to the size of the beads and the desired surface finish.
Steps to Adjust Pressure
Step 1: Evaluate the Workpiece and Abrasive
Before starting the abrasive process, thoroughly examine the workpiece material and the type of coarse abrasive you'll be using. Consider the hardness, texture, and the required finish of the workpiece. Refer to the abrasive manufacturer's guidelines for recommended pressure ranges based on the abrasive type.
Step 2: Start with a Low Pressure
It's always a good idea to start with a relatively low pressure, especially if you're unsure about the optimal setting. This allows you to observe the abrasive's effect on the workpiece without causing significant damage. For example, if you're using a sanding disc on a metal workpiece, start with a light pressure and gradually increase it as you assess the material removal rate and surface finish.
Step 3: Monitor the Abrasive Process
During the abrasive process, closely monitor the workpiece surface. Look for signs of over - cutting, such as deep scratches or uneven material removal. Also, check for any signs of insufficient pressure, like the abrasive not making a noticeable impact on the surface. If you notice any issues, adjust the pressure accordingly. In a sandblasting operation, you can observe the pattern and intensity of the blasting on the workpiece to determine if the pressure is appropriate.
Step 4: Make Incremental Adjustments
Rather than making large, sudden changes to the pressure, make small, incremental adjustments. This allows you to fine - tune the pressure and find the optimal setting. For example, if you're using a power sander, increase the pressure by a small amount after each pass and evaluate the results. Keep a record of the pressure settings and the corresponding results to help you make more informed adjustments in future operations.
Step 5: Consider the Surface Finish
The desired surface finish is an important consideration when adjusting the pressure. If you're aiming for a smooth, polished finish, lower pressures may be required in the final stages of the abrasive process. Higher pressures are typically used in the initial stages for rapid material removal. For example, in automotive bodywork, high - pressure sanding is used to remove old paint and smooth out dents, while lower - pressure sanding is used for the final finish.
Tips for Optimal Pressure Adjustment
Training and Experience
For manual abrasive operations, proper training and hands - on experience are invaluable. Operators should be trained to recognize the signs of correct and incorrect pressure application. They should also be familiar with different types of abrasives and workpiece materials. Regular practice can improve an operator's ability to adjust pressure accurately.
Equipment Maintenance
In automated abrasive processes, well - maintained equipment is essential for accurate pressure adjustment. Regularly check and calibrate the pressure - regulating devices on sandblasting machines, grinders, and other abrasive equipment. A malfunctioning pressure gauge or regulator can lead to inconsistent pressure application, affecting the quality of the abrasive process.
Testing on Sample Workpieces
Before starting a large - scale abrasive project, it's a good idea to test the pressure settings on a sample workpiece. This allows you to fine - tune the pressure and ensure that the abrasive process will produce the desired results. It also helps you identify any potential issues and make adjustments before working on the actual workpiece.
Conclusion
Adjusting the pressure when using coarse abrasive is a skill that requires a combination of knowledge, experience, and careful monitoring. By considering factors such as abrasive type, workpiece material, and application method, and following the steps outlined above, you can achieve optimal results in your abrasive operations.

As a coarse abrasive supplier, I'm committed to providing high - quality abrasives and sharing my expertise to help you get the most out of your abrasive processes. If you have any questions about pressure adjustment or need advice on choosing the right abrasive for your project, I encourage you to reach out. We can have a detailed discussion to ensure that you have the best solution for your specific needs. Whether you're a small - scale workshop or a large - scale manufacturing facility, we're here to support you in achieving excellent results with our coarse abrasives.
References
- ASTM International. (Year). Standards related to abrasive materials and processes.
- Abrasive Manufacturers Association. (Year). Guidelines for abrasive use and pressure adjustment.


